A few months ago, I wrote this post where I showcased Lil Luna Temple Pictures and promised to show you another way of using the temple pictures provided. So here are the temple pictures I did and I'm going to show you how to do it.
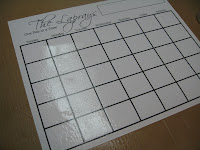
I am going to show you how to get this antiqued/weathered picture look, but instead of a temple picture, I'm doing it to my 16x20 Calendar.
What you need:
- picture you want distressed
- spray bottle filled with water
- walnut distress ink (bottle form)
- paint brush (no sponge brushes)
 I purchased my distress ink from Scrapbooks ETC, but not all scrapbook/craft stores have it stock and some of them don't even carry it. Call ahead before making any special trip and be sure to ask for the bottled version...not the stamp pad. If you would rather, you can buy it online from Amazon here and save yourself a little bit of time and trouble.


 Lay your picture on a flat protected surface. I used a piece of cardboard to protect my table.
In a disposable cup or bowl, squirt in one dropper full of the distress ink and add about 1/3 or 1/2 cup of water.
Then take your spray bottle and spray liberally over your picture. Should be completely wet.
Take your paint brush, dip it in the distress ink mixture, and glide over wet picture. Do this as much or as little until you get it the way you want it to look.
Put it in a safe place to dry, but don't leave it for long periods of time. As it dries, the ink will begin to pool around the edges and may create an undesired look. Then again, if it does do this, it will look like an old picture that you pulled out of the attic, but I would still keep and eye on it just to be sure. If it's not looking the way you want, take your brush and smooth it out a little. You can also speed the drying process with a blow dryer if you want.
Be sure to let it dry completely, then you're done. Here's my completed calendar and I love how it came together.
If anyone is curious, I purchased my frame from Art City Frames on Etsy and I absolutely love it.


Saw you on Linky, Love your tutorial. I am now google following you, please pop by, karima x
ReplyDeletewww.karimascrafts.com
I love this technique!! Thanks for sharing!!
ReplyDeleteLOVE It! thanks for sharing this, I have been googleing this for ages, with no luck.
ReplyDeleteYou rock!
cat
@catherinascreativecorner.blogspot.com