Showing posts with label Tutorials. Show all posts

Profiles

3/5/13


Hello world!
I have been busy since the beginning of the year, but I have been doing some crafts!
My family and I moved (again) to the Chicago area for my husband's job.
It has been a big adventure, and I am trying to get used to this cold weather and snow.
 
One of the crafts I have finished are these profiles of my children.
I love them.
Seriously, love them.
I have done a tutorial (shocking I know) on my blog Life Framed by Me.
Check it out HERE.
Happy creating, and I hope to be back soon!

Girl's Camp "Flashlight" Devotionals {Light Bulb}

9/29/12


#2 - The Bulb
The second thing you need for flashlight to shine is the bulb.  The bulb represents the light that each Young Woman shines forth.  This is their testimony, their service, and the example they give to others.  It is the component that actually admits the light.

Here's what I did for the handout.
You can buy these adorable bulbs at Hobby Lobby for $1.49 each.  I also got them with the 50% off glass promotion, so hold out for that.
Then I went to the local candy store.  Where I purchased pearl Sixlets.  Do not try lemon heads, they are too big.  I wanted them to be white, but yellow would be great too.

Then I simply filled them with candy and made this handout.


Girl's Camp "Flashlight" Devotionals {Battery}

9/27/12


#1 - The Battery  
First you need a battery which represents the things we need to do to keep our spiritual batteries at full charge.  These things are scripture study, prayer, and Personal Progress.

Here is what I did for a handout.
I bought these containers from Walmart.  They are called 'Darice Organizer Jewelry Design Bead Storage System 12 Containers'.  These containers were the perfect size and shape for my battery handout.

Then I made and printed this to go around!  I looked at the Duracell battery really closely to make it look as similar as possible, but in cuter paper.

Inside I put this necklace, but you could also do some candy.   Then I taped the paper around it so that it could be slipped on and off.

Girl's Camp "Flashlight" {Flag}

6/20/12


Shortly after I called to a Beehive Adviser, I was also called to be the Ward Camp Director.  I LOVE Girl's Camp.  I have been wanted to serve in Young Women's for a long time mostly so that I could go to camp.  I just wanted to kick back and enjoy it, but that doesn't happen when you need to get paperwork, collect money, and come up with all the fun ideas and devotionals.

The Young Women's theme this year has been "Arise and Shine Forth".  So, it wasn't surprising when our Girl's Camp theme was "Ignite the Light".  Our stake assigned each ward a light source.  Our ward was the flashlight.  When I first heard it, I thought "BORING!"  But when the wheels got turning, things started coming together and I wouldn't have wanted it any other way.

The best thing about this, is that it is totally something that would work for any Girl's Camp because you always have flashlights.  This would be a great idea for mutual as well.  I will totally use this sometime in the future.

First off, I would like to show you the design for the ward flag.

Flag:

With a projector and a sheet, we blew up the image and penciled in the lines.  Then all it took was a little fabric paint and some gems to turn it into something fabulous!  And yes, we used a little bit of glitter fabric paint.  Glitter fabric paint is a little more opaque, so you need to do several coats.

Entry Table Update

5/29/12

Before
After
We moved to Texas a little over a year ago.  While we love the size of this house, it was lacking in storage...namely a coat closet.  So we purchased this entry table from Ikea.  It's perfect because you have 8 compartments.  We bought some baskets for the kids shoes and the upper cubbies we used for the kids to put their schoolwork.  But it was the first thing you saw when you walked into the house.  It needed a facelift.


Project #1
This one was pretty straight forward.  I simply printed of our wedding date.  (Yes, you are seeing it right!  We got married the day after Christmas)  Take a candlestick and a picture frame and glue it together.  Very easy.


Project #2
Again, pretty simple.  I took the other candlestick and added a glass container to the top with some gorilla glue.  I had purchased some wooden balls and I painted them the colors I wanted.  I filled it with the ball and some floral arrangement fillers I got from Michaels.


The End Result
I obviously purchased a new picture of the Salt Lake Temple.  I got it at Deseret Book.  They were no longer making them, so I got it on clearance for 70% off.  It was a steal and it was the perfect colors.  Now, if only I wasn't renting and could paint the wall a different color.

Recycled Leapster or DVD Case

5/16/12

This year, my son needed to complete a recycled project.  I didn't want to just make a piggy bank from an old container or some other thing I would just throw away later.  So thanks to wonderful Pinterest, I found this great solution.  She used a DVD case.  I used a Leapster case because it was a little wider and could fit more colored pencils.

This project wasn't as fast as I thought it would be but part of that is because I probably took some unnecessary steps.  Here is the tutorial of how I did it!

 Take out the cover and save it.

 Remove anything from inside.

 Cut out anything that isn't flat.

 
 Be careful not to cut the outer sleeve. 

Pick out two coordinating fabrics and cut them out.

 Find a piece of something hard and flat.  This was a thick clear sheet.  You could use chip board, cardboard, etc.  Cut it down to fit inside the case.

This is where I could've made this simpler.  I tacked it down with tape.

 I did it with the other fabric as well.

Then I sewed around the edges.

To make the front a little more taught, I sewed a dividing line.  You may not need to do this if you make your fabric tight enough, but I left enough room to do it because it would keep the colored pencils from moving around so much.

 Then I super clued the back down.  BAD IDEA.  It didn't work very well.  Use hot glue!
Then I weighed it down so that it would adhere properly.

Then we took the leftover case and drew on the back of it. 

 
We slip it back in and this was the end result.

Place in the colored pencils and paper on the opposite side.

Let the kids color!

I loved this project because now I have something that is portable and fun for the kids to do.  I want to make one for all my kids now.  It's perfect for church, for the doctors office, road trips, etc.  You could also make one as gifts.  It would be great for Christmas, for Easter baskets, etc.

This one is a lot of fun.  Hope you enjoyed!

Friday's Feature {Paint Chip Matching Game} and Link Party

5/11/12

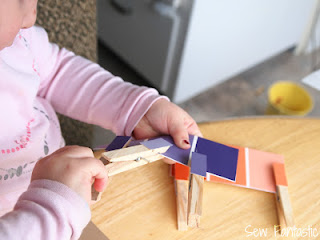
I love, love, love this idea from Sew Fantastic!!!  It's absolutely brilliant and too cute.  In fact I loved this idea so much I ended up pinning it onto Pinterest.  And, before we headed out of town this weekend (we've been overdue for a family vacation) I decided to make these for my girls to play while we're camping.  Such a simple concept, but something that is sure to keep the kids busy and having fun for hours.  Well, maybe not hours, but long enough for me to start a load of laundry.

Rules:
  • Any creative idea will do
  • No selling or promoting, so no etsy stores
  • Giveaways are now permissible ONLY if they are a handmade object
  • Grab a button to link back to this blog
  • Start sharing!
  • And don't forget to check out other link party projects.

Related Posts Plugin for WordPress, Blogger...