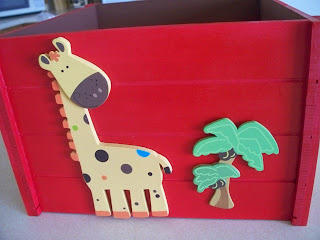
This project was super easy and so much fun to throw together. (Honestly, the hardest part was trying to figure out what colors and theme I wanted to go with, which actually became very frustrating after awhile.) These crates make the perfect little carry-all for books, toys, dress up clothes, diapers, shoes, stuffed animals, you name it. You can itemize them or personalize them and they would make great gifts for Christmas or for your kids teachers.
Here is what you need to get started:
I found all my supplies at Hobby Lobby
*Wooden Crate
*Wooden Chipboard Animals
*Wood Letters
*Spraypaint and Acrylic Paint
*Sponge Brush
*Hot Glue Gun
I first started by spraypainting my crate a cherry red. I didn't sand any of it down, but I made sure to brush off any excess sawdust and particles. I spread this process out over a few days to allow each side and coat to dry thoroughly. In the meantime I went ahead and painted my wood letters a pretty ocean blue.
Once that was done I decided to paint the interior of the crate brown. I did that for a couple of reasons. My original plan was to spraypaint the entire crate red, however I ended up running out of spraypaint. (This is where my frugality starts to kick in.) Instead of running to back to the store to purchase another can of spraypaint I opted to check in my stash of crafting paint to see what I had that would work. I had a few color options that could have worked, but I thought brown would give it a bit more depth. I was right and am so happy I ended up running out of the red color. I love the contrast.Before gluing on my animals and wooden letters I would lay everything out to how I wanted it to look. Then I would glue everything into place one item at a time. That allows you to change things around without committing to something you're not going to be happy with.
Then I went to my local thrift store, Deseret Industries, and found some gently used books to fill up the crate with.
I loved the way this turned out and I think it will look great in the kids play area at my dentist's office.


2 comments:
Great idea! I love the colors- they really pop! Can't wait to see what else you are making.
I will probably make one. I gotta figure out what I want to make it for though.
Post a Comment