
So, with that in mind I started hitting up the thrift stores in hopes of finding a decent costume. Lucky for me I found the perfect little cheerleaders outfit for my youngest girl. And, it was only $3.50.....SCORE!!! (I found the pom poms at Hobby Lobby for $1.00 and I made the little mega phone which will double has her candy bucket. See the tutorial below.)

For my oldest daughter I was leaning towards some type of princess outfit. However, they are ridiculously overpriced and can be a little on the skimpy side. Not conducive for cold weather. Since my oldest is obsessed with dresses right now I decided she had to be dressed up in something that used a dress. So, instead of a princess I went a little more on the traditional side and made her a little Dorothy outfit.

I think all the fabric for this cost me $7.00 and the wicker basket I got at a local thrift store for $1.50. Not bad for something that was thrown together. She had the little black dog (it was a gift from her birthmom) and a friend of mine might have some red shoes she can borrow. If not, I'll be making her a pair.
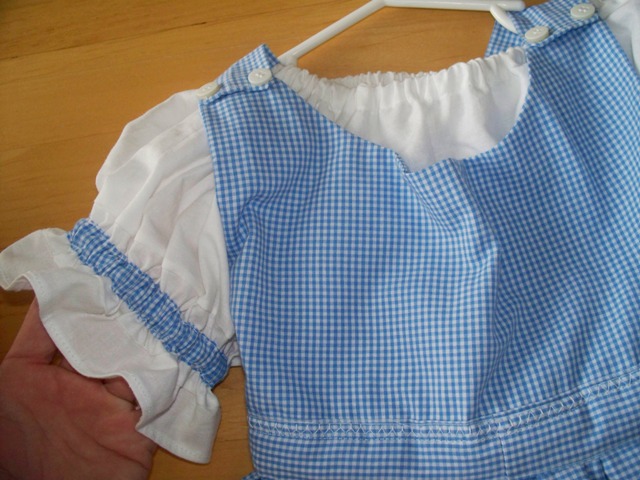
I actually didn't use a pattern for this costume. My little girl doesn't hold still long enough to allow me to take measurements, so I used another dress that she has to create this look. For the shirt I simply followed this tutorial. I also made it on the larger side so it can worn again next year, if needed.

Like I mentioned above I wanted the girls to have a Halloween bucket that coincided with their costumes. So, it was only fitting that Dorothy had a wicker basket and that a cheerleader had a little mega phone. (Karena came up with that one!) Here is how I threw that together.
 Supplies: Crafting Foam, Glitter Paper, Sequins, Scissors, Mod Podge, Staples, and Hot Glue.


I didn't want any candy falling out of the bottom and I wanted a clean look for the "mouthpiece", so, I used a PVC end cap that we had on hand and simply hot glued it to the end of the foam.


No comments:
Post a Comment