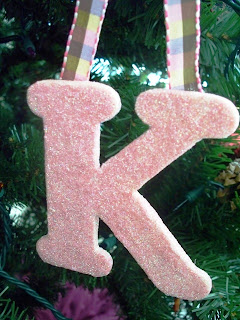
I decided that the first letter of their name would be a perfect little ornament. That way they are different from each other, but somewhat uniformed. I also decided that glitter would be a fun way to go, especially for my girls. However, you could use scrapbook paper, wrapping paper, vintage paper from an old book, or even some family pictures to cover these in. The possibilities really are endless. Once I finished the ornaments I wrote their name, age, date, and 1st Christmas on the back.
Here is what you'll need:
Modge Podge
Fine Glitter
Sponge Brush
Wooden Letter
Ribbon
Hot Glue Gun
I started with the edges first; making sure to cover them completely with Modge Podge. Then added the glitter. You may need to add a second coat depending on the color of your glitter.
Once the edges were dry I did the same thing with the front of the letter. You may find it difficult to get a nice full covering of glitter with Modge Podge, so I would recommend using a spray adhesive, but Modge Podge will work if that's all you have on hand.
Once everything was glitterized and drying I made a little ribbon hanger for the letter. I did that by tying a bow and leaving long enough strand to hot glue to the back of the letter.
That's it. This was such a simple little thing to throw together and I love seeing them sparkle on my tree. If you've done something like this in the past or try this out using a different method please share your projects with us so we can post them for everyone else to enjoy.


1 comment:
Very cute! Glitter adds so much to the tree.
Post a Comment